Showing posts with label home sweet home. Show all posts

Monday, June 25, 2012

Greetings from Florida!


We've finally arrived in Florida!

After spending all day Thursday loading all this:
into our storage cube, Drew and I spent the next two days driving from Saginaw, Michigan, to Cape Canaveral, Florida (our temporary home until we find an apartment in Orlando).

We arrived on Saturday night, alongside tropical storm Debby. So, unfortunately, it's been overcast and rainy since we arrived and we've been holed up in the condo to stay dry. We even closed the hurricane shutters on the patio last night just in case (things have cleared up enough for the sun to at least peek out a bit today, though).
Debby sure knows how to make us feel welcome in our new state...
As far as getting settled here, we pretty much feel like we're on (a storm-affected) vacation right now, although my first job interview in Orlando is tomorrow! So hopefully all goes well and we'll be able to move into our own place shortly. Stay tuned for an update on our job hunt and how badly Debby terrorizes us.

Monday, June 18, 2012

The Big Move

For those of you who haven't heard yet, Drew and I are moving to Orlando this week. As in Orlando, Florida. Yes, this is a huge change for us, but it's something we've been considering pretty much since right after the wedding.

Since we met in Orlando over two years ago when we were living there to intern at Disney, we're familiar with the area (and the weather). We miss being able to visit the parks whenever we want and we want to live in an area with plenty of amenities and things to do and explore.

Around March or April, we finally decided to figure out the logistics to make this move happen, and have been slowly plotting our move ever since. Now we're only a few days away from packing up and heading down South!

I'm sure you have plenty of questions about our big move, so I'll do my best to answer some of the questions we've received the most since announcing our plans to various people.

Where are you going to live?
Our goal is to end up in Orlando, since that's the part of Florida we're familiar with. Plus, given the fact that Florida has hurricane season, we figure it's not a bad idea to avoid the coast. We're incredibly lucky that we get to stay in Drew's grandparents' condo until we figure out exactly where we want to live in the city. Anyone have any nice, safe apartment complexes to recommend in Orlando? Hopefully we'll be looking soon!

What are you going to do when you get there? Do you have jobs?
We're going down to Florida totally blind on the job front, so, no, we do not have jobs waiting for us when we arrive. Drew's job up here ended with the school year, and I quit my job. As of right now we're both completely unemployed, which has been nice for packing and finishing up the final details of our move.

Don't get us wrong, though, we realize the risk we are taking and are as prepared as we can be to deal with our unemployment. One huge thing working in our favor right now is that the Orlando job market for marketing/advertising jobs (the field we both wish to work in) is significantly better than it is in Michigan (go figure). In fact, I already have two interviews lined up for after our arrival. We know we're optimistic, but for now that can only work in our favor!

Are you going to go to Disney World all the time?
Oh, heck yes. After finding jobs and an apartment, I think it's safe to say purchasing our annual passes is next on our priority list.

Are you insane?
Okay, no one has asked us this. In fact, everyone we've talked to about our plans has been incredibly supportive of our decision. Especially our families, which I'll admit was kind of a surprise. But, as I mentioned, the job market in Michigan is not in our favor right now, so taking this leap is pretty understandable. We know this is probably the only time left in our lives when we'll be able to just pick up and move like this, so we're taking advantage of the opportunity. It's now or never, basically (you know, #YOLO and all that).


So that's what's going on in our lives right now. We're really excited for this change, and can't wait to be settled in our new home in Florida. We will absolutely be keeping everyone posted about the move, our job search and our new lives in Orlando. And, of course, we'll be back to the midwest plenty to visit family and friends.

Anyone else picking up and moving to a new state or have other big changes in their lives? We can't be the only ones...

Saturday, May 19, 2012

The One With the Flood

Two weeks ago we had a pretty nasty thunderstorm that flooded our apartment building. Everything was a mess, and I think I'm just now starting to process what happened and feel like everything is back to normal. Sort of.

On Thursday, May 10, we were getting into bed when our power went out. This wasn't really surprising considering that a thunderstorm had been going on outside for a few hours. What was surprising was when frantic knocking on our door woke us up around 3am. A maintenance guy from our complex came by warning us to try to move our cars out of the parking lot right then or risk them flooding and possibly being picked up in the water.

Uh, what?

We found out later that apparently the sump pump in our building quit working and water was flooding not only the parking lot, but had completely filled the basement-level apartments and storage area.
Yes, the water really was almost to the top of the doorway. Notice the floating piece of drywall that broke off of the wall.
We weren't able to move our cars, but luckily they weren't picked up in the floodwaters or damaged too badly. The next day emergency workers came to start pumping water out of our building (and a few other buildings in our complex), while we dealt with trying to dry out our cars. We ended up not having either of our cars for about a week - I couldn't even get a rental car until the next Wednesday because Enterprise had such a long wait-list of people who needed rentals.
Standing water in my car - almost up to the door - the next day.
The nasty water in my trunk.

The next day, after they had started pumping water out of the basement. It took so long to pump out all of the water that we had to evacuate the building over the weekend (since the power couldn't be turned back on with all of the water still there).

The next building over from ours. I added the black arrow to draw attention to the line where the water was in the middle of the night. Some basement windows (including the ones in our building) were actually blown out from the flooding, unlike this one.
Everything in the basement obviously was much worse off. Almost everything we had stored down there had to be trashed, but fortunately we didn't keep much down there to begin with (mostly moving boxes). Our biggest losses were our Christmas tree, Drew's bowling balls and our nice down comforter we bought as a wedding gift to ourselves. Crappy? Yes. But there are two units in the basement that people lived in, and they lost everything. We were lucky. We were even able to save most of our Christmas ornaments (some fabric ornaments from Drew's grandparents were even completely dry), which was my biggest concern.
Our apartment complex is still in shambles two weeks later. Emergency restoration workers are still here, and most of the trash (a.k.a. everyone's possessions from the basement) has just been removed. Don't even get me started on the damp, moldy smell that hits us every time we enter our building (but thankfully hasn't made it up to our third-floor apartment).
One of the giant dumpsters invading our parking lot so the workers can throw out basically our building's entire basement.
What the basement looks like now. Hard to believe the door on the right led into someone's apartment two weeks ago.
So that's what's happening in our lives right now. It wasn't fun, but at least it's pretty much over. And for anyone wondering, the residents in the basement apartments made it out safely before the water level got too high (you can read some of their story here).

I think it goes without saying that I've been pretty busy and preoccupied lately, but I'm hoping to be back soon with another recipe review and news about what we're doing this summer. I can't wait to not have to deal with this anymore!

Monday, April 30, 2012

Recipe Review: Oatmeal Bars & Chicken Chili

I've recently tried some new recipes that I think are worth sharing. I found both recipes via Pinterest, of course. Enjoy!

Peanut Butter Banana Oatmeal Bars
from Gingerbread Bagels
I actually tried this recipe twice: first subbing applesauce for the bananas, then with bananas. I didn't use eggs either time since we don't have any on hand, and got sort of mixed results. The applesauce version came out fine in my opinion, probably because the applesauce kept the bars moist. The banana version was a little crumbly, though, and definitely needed the eggs to hold everything together. They still tasted fine, though. The first time I tried this recipe I actually at the whole pan myself in two days, so I guess you could say they're tasty. I highly recommend eating these bars warm.
Also, as an FYI, these bars are sort of cake-y as opposed to being more chewy or solid like a granola bar. So don't expect a homemade Kashi bar or something out of this recipe. And definitely don't skip the eggs in the banana version.

Grade: B 
While tasty, these bars could use a bit more flavor - maybe from some chocolate chips or pumpkin pie spice. If I make these again, I'm going to stick to the applesauce version for sure.

Slow Cooker Chicken Chili
from Skinny Taste

[check out Skinny Taste for pictures, because this recipe is anything but photogenic]

This recipe was so, so good. Drew and I have made chicken chili in the past using Ina Garten's recipe, but we agree that this recipe from Skinny Taste tasted more like chili and less like a vegetable soup with chicken. Plus this recipe was significantly less time-consuming.

Since this is a slow cooker recipe, the hands-on time was only about 10 minutes. I think the hardest part of this recipe was chopping up the onion. This recipe was delicious, incredibly filling (fiber!) and so easy. It makes a ton, so be prepared to eat this for a week or make this for guests.

Grade: A
Next time we're going to double the chili powder for more kick.

Have you tried any recipes lately that are worth sharing? Let me know! Or, find out what other recipes I've been pinning for your own inspiration.

Thursday, March 29, 2012

New Couch & DIY Pillows

Our apartment finally has a new couch!
About a month ago we finally bit the bullet and decided to finance a new sofa to replace the old, dingy couch I inherited from my parents when I first moved to Michigan. So when an awesome sale was taking place at Art Van (like, every week), we picked out a new couch to have a nicer, newer and more comfortable couch to lounge on.

The downside? We had to special order our new couch (the only color they had available immediately was some weird green-khaki shade), which meant waiting up to eight weeks for it to arrive in-store and be delivered. Bummer.

Lucky us, though, our new couch arrived in about half the estimated time! So now our living room looks like this:

So much better than it looked with the old couch. (By the way, I explained the mirrors earlier this week).

As for the old couch, we opted not to get rid of it immediately and moved it into our second bedroom/office. Plus, we didn't have to lug the old couch out to the dumpster or figure out how to get it to Goodwill (there's no way that beast could fit in a normal car).

But back to our new couch. We love gray, but not that much, so we needed something to bring some life into the color palate. I had some extra fabric lying around that I had picked up from the clearance aisle at Jo-Ann's awhile back, so I used that to whip up some pillows.
This was my first attempt at sewing my own pillows, and it was so incredibly easy. I didn't use any tutorial or a pattern - I just measured out 4 equal pieces of my remaining fabric to make two small pillows. Pretty simple!
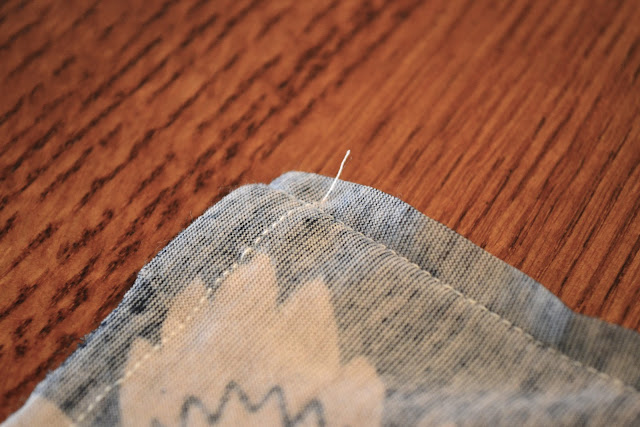
I used this tutorial to sew an "invisible" seam to close up the pillows.

The pillows aren't perfect looking, but they're pretty comfortable and add a nice pop of color to our giant gray couch.
Making these pillows gave me more confidence in my ability to sew in a straight line, so now I feel like I'm ready to tackle a more involved project. I definitely have plenty of ideas floating around on my Pinterest boards right now, so I just need to get started!

Tuesday, March 27, 2012

Mirror(s), Mirror(s)

Drew and I have been busy redecorating our living room lately: new couch, DIY pillows and a fun mirror project. I'll get to the couch and pillows later this week, but for now let's talk about the mirrors.

Of course I found inspiration for this project on Pinterest. I found this pin a few months ago, and we've been hoping to implement something similar in our apartment ever since.


We loved that the project used simple back-of-the-door mirrors and would be super cheap, especially compared to a larger mirror that would take up the same amount of space.

Hanging up three mirrors on a wall seems pretty simple, so why did it take us somewhere around 4 months to finally get this project accomplished? Well, we didn't want to hang up plain mirrors. Sure, they look great in the picture and would look great on our walls as well, but we wanted to add a personal touch.


Our second inspiration for our project came from quite a few sources, but the one that helped us out the most was (of course) Bower Power. Katie added a stenciled pattern around a window, and we loved the idea enough to try it on our mirror project.


We like the look of frosted glass stencils, and Katie had nice, thorough instructions for us to follow. We basically did the exact same thing she did with her window with almost the exact same products.

Frost effect paint and stencil sponge brushes by Martha Stewart, purchased at Michaels.
Originally we planned to put the mirrors above the dresser in our bedroom, so we picked up a floral stencil from Michael's that coordinated really well with our bedding. By the time we got around to actually tackling this project, though, we changed our minds and decided to put the mirrors in our living room instead. So the floral stencil had to be replaced.

Drew came up with the awesome idea to use a skyline as our pattern, so he printed out a picture of the London skyline and cut out the image with an exacto knife to create a stencil. (Why London? No real reason, but it is the only foreign city we've both been to - although not at the same time).

The project was super straight-forward after that. We taped the stencil in place and used our stencil brush to lightly layer on the frosted paint (we ended up doing two layers of paint). After the paint dried we peeled off the tape, and were finished!
Well, except for actually hanging up the mirrors, which was a little tougher. A little piece of advice: when using 3M velro strips to hang up a mirror, do not put all of your body weight into the back of the mirror. It will crack, and it will be tragic. Plus, you'll have to delay finishing your project so you can pick up a new mirror at Target. Not that I'd know any of this from experience or anything...

Anyway, we relied on good old trial and error to map out where we wanted our mirrors to hang and where to place the velcro strips. There is probably a simpler way to hang up mirrors in an evenly spaced pattern than using pencil marks, rulers and guessing, but eventually we figured everything out and now have three mirrors hanging next to our brand new couch in the living room.


We still have a lot of rearranging/redecorating to do in our living room (and our apartment in general), but we think things are coming together pretty well so far. Our mirrors make the room feel bigger and brighter, and we love how they turned out.

Don't forget to check back later this week for a recap in my adventures in pillow-making.

Wednesday, March 14, 2012

Pinterest Challenge: Felt Coasters

Young House Love and Bower Power issued another Pinterest Challenge last week, and I couldn't resist the chance to tackle another project on my ever-growing DIY inspiration board. (For my previous Pinterest Challenge project entry, click here. Or check out my Pinterest boards for more ideas).

My contribution to this season's challenge: modular felt coasters.
Originally Drew and I planned to tackle a mirror project we've been considering for months, but we opted to spend our weekend loafing about instead of stenciling mirrors, so I'll have to share that project another day.

Getting back to the felt coasters, though, I ran across this tutorial on How About Orange yesterday morning, and knew this was the perfect project. I've been considering making some felt coasters anyway, and these are a quick, no-sew project. Perfect!

The best part about this project is that the finished product looks so much more complicated than it really is, and everything comes together so quickly. Start to finish, I probably spent about 10 minutes making 4 coasters. These would be a great little gift or stocking stuffer since they're easy, quick and cheap to make but still look cute.

For this project, I only needed two sheets of felt to make four coasters. I chose hot pink and gray since we don't plan on using these coasters in our living room and I wanted something fun.

Using the template available on How About Orange, I used my new rotary cutter to cut out eight slotted pieces per coaster.
The pieces all interlock (similar to how you fold the sides of a box over to keep it shut), leaving this:
The final step is to cut each "arrow" at an angle for a cute finished product. See, I said this project was insanely simple!
Of course I can't end this post without a big thanks to How About Orange for the excellent tutorial and template (she also has a template for a larger version here).

So that's my Pinterest challenge project! Hopefully Drew and I will get around to those stenciled mirrors soon so I can have another fun DIY project to post.

Anyone else participate in the Pinterest challenge? What projects are on your to-do list?

Tuesday, March 13, 2012

Recipe Review: Broccoli-Cheese Soup

A couple weeks ago I made a batch of broccoli-cheese soup, using a recipe from The Pioneer Woman.

Drew and I have been craving broccoli-cheese soup for a while now, so I searched the internet for simple, delicious-looking recipes. I should have known the Pioneer Woman would deliver.

The recipe was super easy to follow and didn't take too long either. I followed her recipe exactly, except I used skim milk in place of whole, frozen broccoli instead of fresh and omitted the nutmeg (can you believe our giant spice rack we got as a wedding gift doesn't have nutmeg in it?).

The steps were pretty simple: chop up an onion, throw it in a pot with a bunch of dairy, add broccoli, simmer, add cheese and eat.
Three cups of cheese is... a lot of cheese.
Somewhere in between "add broccoli" and "eat" things got a little crazy. I don't know if it was the extra water from the skim milk and frozen broccoli, high heat or something else entirely, but the whole mixture just sort of separated. It was not attractive.

Not only that, but we just weren't getting the cheesy taste we wanted. I originally added three cups of cheese according to my measuring cup, but the soup just tasted like cream of broccoli so we doubled the amount of cheese.
According to a handy measurement converter magnet we have, the double amount of cheese was only two cups in ounces. So either we added twice as much cheese as the recipe called for, or not quite enough. Either way, the soup still wasn't as cheesy as we hoped it would be. Does anyone know if you're supposed to measure cheese in ounces or not? Why such a weird discrepancy in amounts?

After all that, we spooned the soup into our blender in batches to chop everything up a bit and try to remedy our separation problem. No such luck on binding things together better, but at least it looked a little nicer (although not nice enough for me to take a picture - I was pretty over this recipe at that point).

The verdict: While the soup still tasted fine (but not great), it looked absolutely disgusting even after blending. I wish I would've read the comments beforehand to see that many people experienced what I did: separated milk and not enough cheesy taste. Unfortunately this recipe is not a keeper for us.

I'll be honest, we're probably not going to eat all of this stuff (we have a bunch of it in our freezer right now). I'm not exactly sure what went wrong with the recipe, since plenty of other commenters said the soup came out perfectly for them. Maybe subbing skim milk for whole made that much of a difference? I don't know. Oh, well. I guess we're just going to have to go with store-bought the next time we want broccoli-cheese soup.

Has anyone else tried any new recipes lately? I need some ideas!

Wednesday, February 15, 2012

Saturday, February 11, 2012

Quick Apartment Update

So, long time no post, huh? I haven't blogged in over month partly because work has dominated my life, partly because I haven't felt like it and didn't want to force out a boring post and partly because I just didn't have much to write about.

Even though I haven't been writing lately, I have made a few changes to the look of this blog. You may notice the header is now one of our wedding pictures, and I also added buttons linking you to my Pinterest boards and my Twitter feed. I'm so social-media minded.

Anyway, today Drew and I made some progress with our apartment with a quick kitchen update. The kitchen in our current apartment is so, so much better and bigger than our old apartment, but we still need a bit more storage than the kitchen offers (blame it on the wedding gifts).

About a month ago we purchased a cabinet to put in an unused corner of our kitchen to use as sort of a "beverage station." We liked how it cleared up extra counter space for us, but we didn't like the cluttered look on the counter or the empty wall space surrounding it.

This morning we finally did something about it and put up some shelves to make the space look a little nicer.
The "before" shot, plus the templates for our soon-to-be-installed shelves.
Even though our shelves came with templates to make the installation process "easier," it still took us a good 30 minutes or so to get the screws in place and everything lined up properly. Thank goodness Drew is more patient than me and was able to power through the minor setbacks to finish the job!

The finished product isn't a huge change from what we had before, but we like how it looks and the small amount of additional storage the shelves provide.
All filled up - we may change some of the items out, but this was the best we have for now! 

Now if only we could do something about the electrical box/eyesore on the wall, we'd be all set!

And just for fun, here's some shots I took of our little bar area:


P.S. Yes, that is a SodaStream machine on the cabinet. We purchased it with some of our Macy's store credit (another wedding gift perk), and have been using it like it's our job ever since. Which probably means we drink too much soda, but it's actually kind of fun to use and we don't have any soda bottles to take back to the store anymore. I highly recommend it.

Wednesday, January 4, 2012

My 2012 To Do List

It's the time of year when pretty much everyone is setting goals for the new year, and, for the first time ever, I'm taking part in this tradition!

I don't really like the whole idea of New Years' Resolutions, because why wait til January to make a positive change in your life? Plus, I think New Years' Resolutions have a negative connotation to them since they stereotypically don't last (January gym-goers, anyone?). However, I do like the idea of setting goals and making a list of things I'd like to accomplish/experience in the year ahead. No pressure to make dramatic changes to my life or set myself up for failure (in fact, I already have plans in place for many of these), just a list of to-dos for the next 12 months.

With that, here's my (tentative and subject to change) list of goals for the next year.

2012 To Do List

  • Complete a 5k race with Drew. This one has taken a bit of leg-pulling, but I think I've finally convinced Drew to register for a St. Patrick's Day 5k with me. We agreed we don't have to run the whole thing, just do our best and have fun. And, of course, get a finisher's medal.
  • Go on a mini-vacation. Drew and I were a bit spoiled in 2011 and got to travel to Disney World twice (in January when we got engaged, then again in October for our honeymoon). This year, a full-on vacation seems unlikely, but I'd still like for us to be able to get away for a few days and relax. Luckily my cousin is getting married in August, so as long as my request for vacation days goes through at work, we'll be traveling to Boston for a few days! I've already started looking at flights, and we're trying to figure out a way for about 15 of us to see a Red Sox game together. It's definitely going to be a great time!
  • Paint our apartment. I'm one of those people that strongly dislikes all-white rooms because I start to feel like I'm living in an insane asylum. We weren't allowed to paint in our last apartment, though, so I've kind of grown accustomed to white walls surrounding me (maybe that's why I feel like I've gone crazy?). Our new apartment allows us to paint, and I fully intend to take advantage of that in the coming year. I think we've been hesitant so far because we're still getting settled and are slowly accumulating more furniture to fill the place out. Hopefully once the weather is nice enough for us to open our windows and ventilate we'll have decided on a paint color for at least one of the rooms in our apartment. Goodbye, white walls!
  • Use my sewing machine. Since I started using Pinterest a few months ago, I've been itching to own a sewing machine so I can complete some of the amazing crafts pinned. Good thing Santa brought me a machine for Christmas! I'm slowly taking baby steps to actually sew something with it, but I'm stuck at Step 1: take the machine out of the box. But, I did stop at JoAnn Fabrics yesterday to pick up some fabric, so once I finally take my machine out and set it up, I should (hopefully) be good to go. The first project I have in mind? A variation on these fleece ear warmers.
  • Decorate my home office. Not unlike my actual office at work, my home office is a total disaster area. To say I've been making slow progress on organizing and putting stuff together is a serious exaggeration. Everything is pretty much in piles on the desk and floor, and our printer is not on a table, but its box. It's sad, really. One of these days I'll finally pick up some organizational accessories, get a table for that printer and make the office look less like a storage area or my high  school bedroom and more like, well, an office.
And those are my 2012 goals, for now anyways. I'm sure I'll add plenty more to the list in the next few weeks or months. Hopefully I can actually accomplish everything on my list in the next 12 months (or really the next 3-6 since none of my to dos are particularly lofty).

What's on YOUR to do list for 2012?

Saturday, December 3, 2011

Oh, Christmas Tree

Our Christmas tree is officially set up and decorated!
Last week Drew and I purchased our first Christmas tree and set it up in our new apartment. We got a pretty good deal on an artificial pre-lit tree at Sears on Black Friday, and we couldn't wait to set it up and bring some Christmas cheer to our little home!

We started by fluffing out the branches to make everything look fuller.
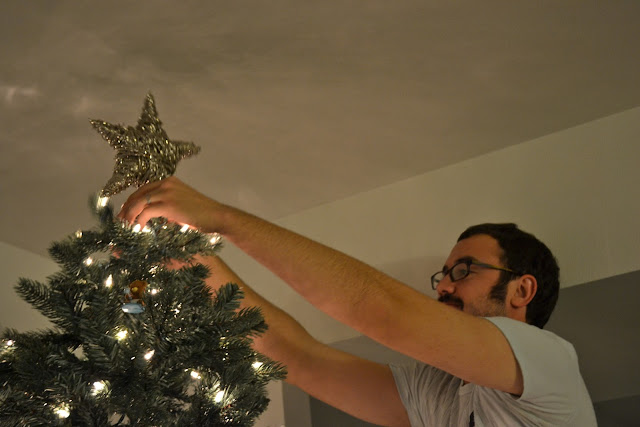
 Drew had to go solo on the taller branches since I couldn't reach to the top of our 7.5' tree.

And, yes, he does have a mustache for the time being.
 Here's our tree all assembled and ready for ornaments:
We don't have a ton of ornaments right now since we're just getting started on our own, but we did have some ornaments we received as wedding gifts to display.
And, of course, a few Disney ornaments made their way onto our branches. We picked up this on on our vacation with Drew's family last year, just before getting engaged:
Right now the other ornaments we have on the tree are some of Drew's childhood ornaments and some basic red and green glass balls we picked up at Target.

We also have a few "fancier" ornaments we picked up at the Pottery Barn Outlet last weekend, like some cool textured white ornaments and a cute little Santa. Our tree still has some empty space, but those will be filled when we get my ornaments in the mail from my parents any day now.

Our tree topper is a sparkly star from Target. I didn't think Drew would go for it since it's so glittery, but he was actually the one who suggested buying it. It's the perfect finishing touch to our simple tree!

Here's our tree in all of its glory, complete with ornaments, a tree topper and plenty of presents around the base:
Like I mentioned the other day, we're already almost done with our Christmas shopping and gift-wrapping, thanks to a gift wrap set of paper and bows I picked up in Target's 50% off after-Christmas sale last December.

Presents!
 Our tree is perfectly complemented right now by all of the snow outside of our living room window.
The view from our balcony.
 Oh, and we do have one more Christmas touch in our apartment - on our new dining room table!
When we went to the Pottery Barn Outlet last week to pick up some bonus ornaments, we also snagged this decorative lantern. The best part of the trip? This lantern and six ornaments only cost us 50 cents since we had a coupon and a rewards credit (from our Pottery Barn card) for a total of $50 off of our purchase. Not too shabby!
 Instead of filling our lantern with candles we decided to fill it with some extra red, green and silver ornaments for an extra bit of holiday cheer on our table.
And those are our Christmas decorations for now! All we really have left to do is buy stockings and a couple more presents for our families, and we'll be all set to celebrate the holiday.

Anyone else decorate their Christmas tree or put up other holiday decorations yet?

P.S. If anyone is still getting caught up on our wedding recaps, be sure to check out the new page up top, Our Wedding Recaps, with a roundup of all of my wedding and honeymoon posts.